

A blazer that looks immaculate in your retouching window can move like folded card stock the moment it becomes video. That gap between a flawless still and dead motion is where most ghost mannequin video mistakes start, and almost none of them are the generator's fault.
You are not retouching badly. You are retouching for a still, while the model reads the plate as physical evidence.
This guide works the eight failure points that survive a clean-looking plate, in symptom, cause, fix order. You will learn what a generator needs to see before upload, when mannequin removal should happen relative to generation, and which single shadow decides whether a garment has mass. It also covers one common retouching habit â the one nearly every tutorial recommends â that quietly deletes the evidence motion is built from. That habit sits in step three.
If you already own catalog photography, turn clothing photos into video from those files instead of booking a shoot; the fixes below decide whether that footage holds up.
What Does the Generator Actually Read in a Ghost Mannequin Plate?
It reads drape cues: the visible evidence of how fabric responds to gravity and contact. Design detail and color accuracy matter, but drape cues are what separate derived motion from motion the model has to invent.
A ghost mannequin â also called the invisible mannequin effect â is a compositing technique in which a garment is shot on a form or partly filled and the form is then removed, leaving the item apparently self-supporting. Drape cues are any visual evidence of how fabric responds to gravity and contact: fold curvature, contact shadow, hem break, and sleeve occlusion, where one sleeve overlaps the body and shadows it. Occlusion shadow is the darkened area where the garment touches whatever it rests on. Fabric memory is a garment's tendency to return to shape after compression, which survives into the plate only if the plate shows it compressing.
Why garments look stiff in AI video made from ghost mannequin photos: a plate carrying no fold curvature, no contact shadow, no hem break and no self-occlusion gives the model nothing to extrapolate from. Where a plate shows how fabric responds to gravity, motion is derived from that evidence. Where it does not, the model interpolates between poses instead of simulating cloth â and interpolation with no drape evidence reads as cardboard.
Think of it as the difference between animating a walk cycle and cross-fading two photographs of someone standing still: the second has frames, but nobody is moving.
Does resolution or lighting matter more? Lighting first, resolution second, and both rank below drape evidence. A flat, shadowless 2000px plate tells the model almost nothing about mass; a 1200px plate with a defined contact shadow and a visible hem break tells it enough. Rank the variables this way â drape cues, lighting direction, resolution, color accuracy â then fix them in that order and stop when clips read as fabric. Most catalogs over-invest in the last two.
Source selection by garment structure
| Garment structure | Best source | What to protect |
|---|---|---|
| Structured tailoring | Ghost mannequin holds shape | Neck joint, shoulder shadow |
| Fluid knits, jersey, slips | On-model or partly filled form | Body-contact drape |
| Heavy outerwear | Flat lay or partly filled form | Volume at shoulders |
Match the source to the structure, then send that set to the clothing video generator and let the cues work before a single frame renders.
How to Fix Stiff Motion Before You Upload, Step by Step
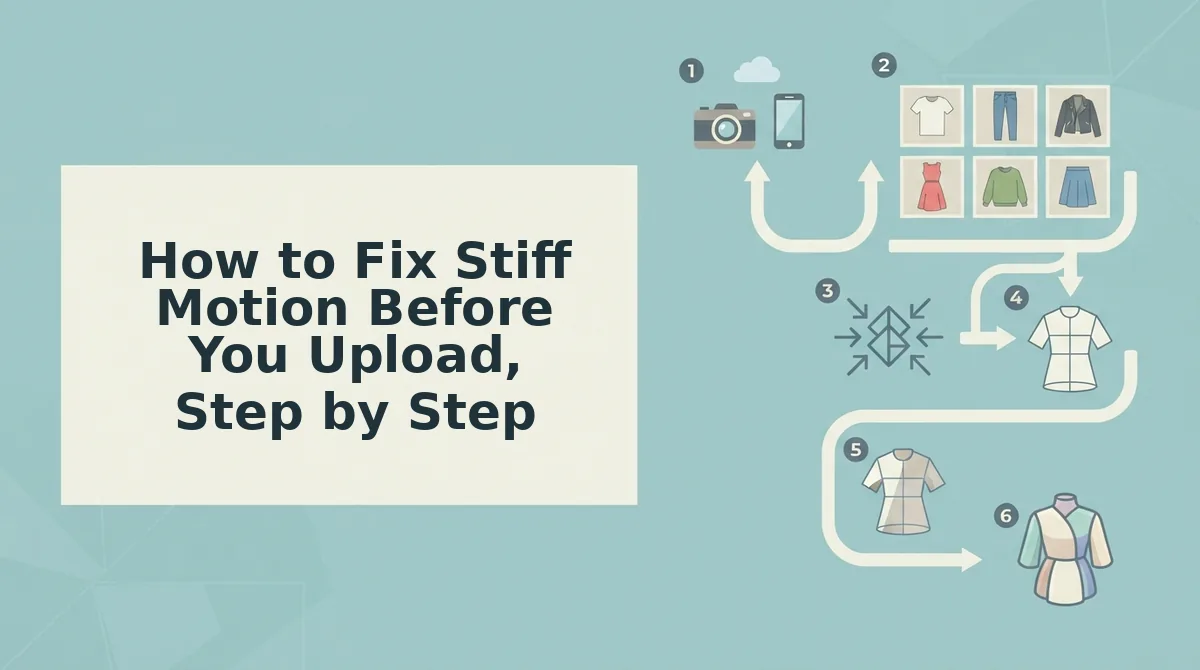
Fix the plate, not the prompt. Stiffness is usually locked in before generation, so work these eight steps in order on the source files and generate once at the end.
You need the original photography for one SKU, a layered raster editor, and 30 to 45 minutes per garment. Work on a duplicate so the catalog master stays intact.
- Sort source images by garment structure first. Open the SKU folder and split it into tailoring, fluid knits and heavy outerwear. Move fluid knits off the ghost mannequin track and onto on-model shots. You should end with three folders and no ambiguous orphans. Allow 15 minutes.
- Remove the mannequin in the still, before generation. Build the hollow neck, cut the form, composite the interior, export the finished plate, then generate from that file. Generating first and removing afterwards leaves the model animating a form that no longer exists. One exception: when the collar is the hero detail, leave a small interior volume in the neck and accept a slightly less clean removal.
- Rebuild the contact shadow where garment meets background. Symptom: the item floats and flexes like a decal. Cause: lifting the background to pure white deletes the contact shadow â the only cue telling the model the item has mass. Paint a soft, low-opacity shadow back under hem, cuffs and shoulders, echoing the original light direction, and stop short of a hard line. This step carries more weight than any other; budget 10 minutes and check the hem settles rather than slides.
- Reshoot the neck joint instead of repainting it. A torn or morphing collar means a painted hollow neck with no interior geometry, so the model has nothing to anchor to. Reshoot with a small roll of fabric or foam retained inside the neckline, then composite around it. See fix a hollow ghost mannequin neck.
- Pull the pins and clear clip creep. Clip creep is the compression shadow left where clips held fabric flat. Zoom to 200 percent along side seams and shoulders, clone out residual dents, or reshoot with fewer, softer clips. Toggle the retouch layer off â no straight-line shadow should return.
- Stop liquid-retouching every fold. Keep folds that describe how the garment hangs; remove lint, dust and shipping creases only. Smoothing every wrinkle deletes the variation the generator interpolates from, which makes the clip stiffer, not cleaner. If a fold looks untidy but explains weight, leave it.
- Normalize lighting and color across angles. Match white balance, exposure and shadow direction on front, back and detail frames. Mismatched direction forces the model to average the light, and averaged light flattens volume. Four matched angles beat six mismatched ones.
- Upload three to six angles and generate once. Select the finished plates in order â front, three-quarter, side, back, detail â and generate. Review the file yourself before it goes anywhere; the tool produces the video, a person approves it.
Generate the clip, then run the four-point drape-cue audit below to confirm it reads as fabric and not as a decal.
How to Check It Worked: The 4-Point Drape-Cue Audit
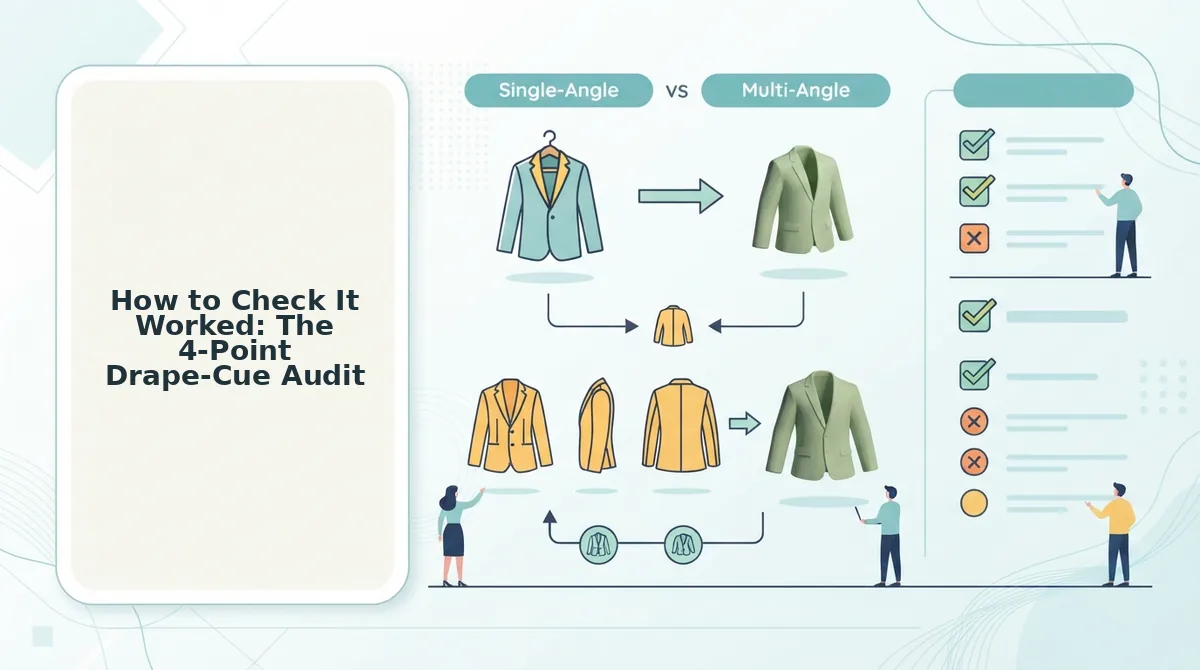
Run four visual pass/fail checks on the plate before you spend a generation: silhouette integrity, contact shadow, resolution, and lighting evenness. Fewer than three cues present means reshoot or change the source image â not re-generate.
The audit is a pure visual pass/fail with no measurement tools, which is what lets a merchandiser run it across an entire SKU drop in minutes without a retoucher. Each cue gets one line: a pass condition and a failure symptom. You are not grading photographic beauty, only whether the information the generator needs to derive motion is physically present in the pixels. A plate that passes all four gives motion that is observed; a plate that passes two gives motion that is invented, and invented motion is what reads as stiffness on a model who never moved. Order the checks as above and stop at the first failure if time is short â silhouette problems are never recoverable downstream.
- Silhouette integrity. Pass when the neckline, armholes, and hem read as a closed three-dimensional volume with visible interior darkening. Fail when edges look painted flat against white; no settings change recovers a shape the plate never contained.
- Contact shadow. Pass when the garment casts a soft occlusion shadow onto the body or surface beneath it. Fail when the item floats on pure white â the generator has no anchor, so it slides the garment instead of draping it.
- Resolution. Pass when fabric weave, stitching, and fold gradients stay sharp at full crop. Fail when edges smear into the background; softness blurs the cue boundaries the model reads as drape direction.
- Lighting evenness. Pass when exposure holds across front, side, and interior without blown highlights or crushed blacks. Fail when hot spots clip fold shadows â see ghost mannequin lighting for video for the reshoot setup.
Any apparel plate that clears three of the four cues is worth generating. If yours routinely clears two, fix the capture stage before scaling the drop.

Questions Catalog Teams Ask About Ghost Mannequin Video
Does resolution or lighting matter more for ghost mannequin video?
Lighting evenness matters more. A flat, evenly lit plate preserves the cue edges â silhouette, shadow boundary, fold gradient â that the generator reads, while a higher-resolution plate full of hot spots clips those same edges. Resolution ranks second: it sharpens cues you already have but cannot restore ones blown out by uneven light.
Can I use dress form shots instead of ghost mannequin photos?
No â dress form shots fail on two counts. The stand hole leaves a neck opening with no interior geometry, so the generator invents the collar, and the form's seams press horizontal crease lines into the fabric that read as a permanently folded garment. A flat lay or a properly shot ghost mannequin plate avoids both problems.
How many angles should I upload for each SKU?
Three to four of the available six slots is enough for most apparel. Front, back, a three-quarter or side view, and one fabric detail give the generator the parallax it needs to separate garment volume from background. Additional angles rarely change the output enough to justify the upload time across a large drop.
What if my catalog is already shot and I cannot reshoot?
Run the four-cue audit and generate only the plates that pass three cues or more. Already-shot catalogs usually contain a mix: plates with retained shadow and clean silhouettes convert well, while flattened, shadow-stripped plates stay stiff however many times you re-run them through a fashion product video generator.
What to Change on Your Next SKU Drop
Stop chasing the cleanest plate. The highest-leverage change is keeping the contact shadow instead of painting it out â that shadow is the cue the generator reads to infer how fabric meets the body and the floor, and removing it is the most common reason a flawless-looking plate generates stiff motion.
Keep the fold evidence, then run the four-cue audit before you spend a generation. Prep mistakes cost a reshoot; the errors the audit catches cost nothing.
If the catalog is already shot and cannot be redone, take the plates to the fashion product video generator and let the audit sort which SKUs are recoverable. Where a garment failed the structure check outright, rebuild it as a flat lay to fashion video asset instead. Start with one SKU: audit it, generate it, then judge the motion against the same four cues before committing the drop to the AI clothing ad generator.
