
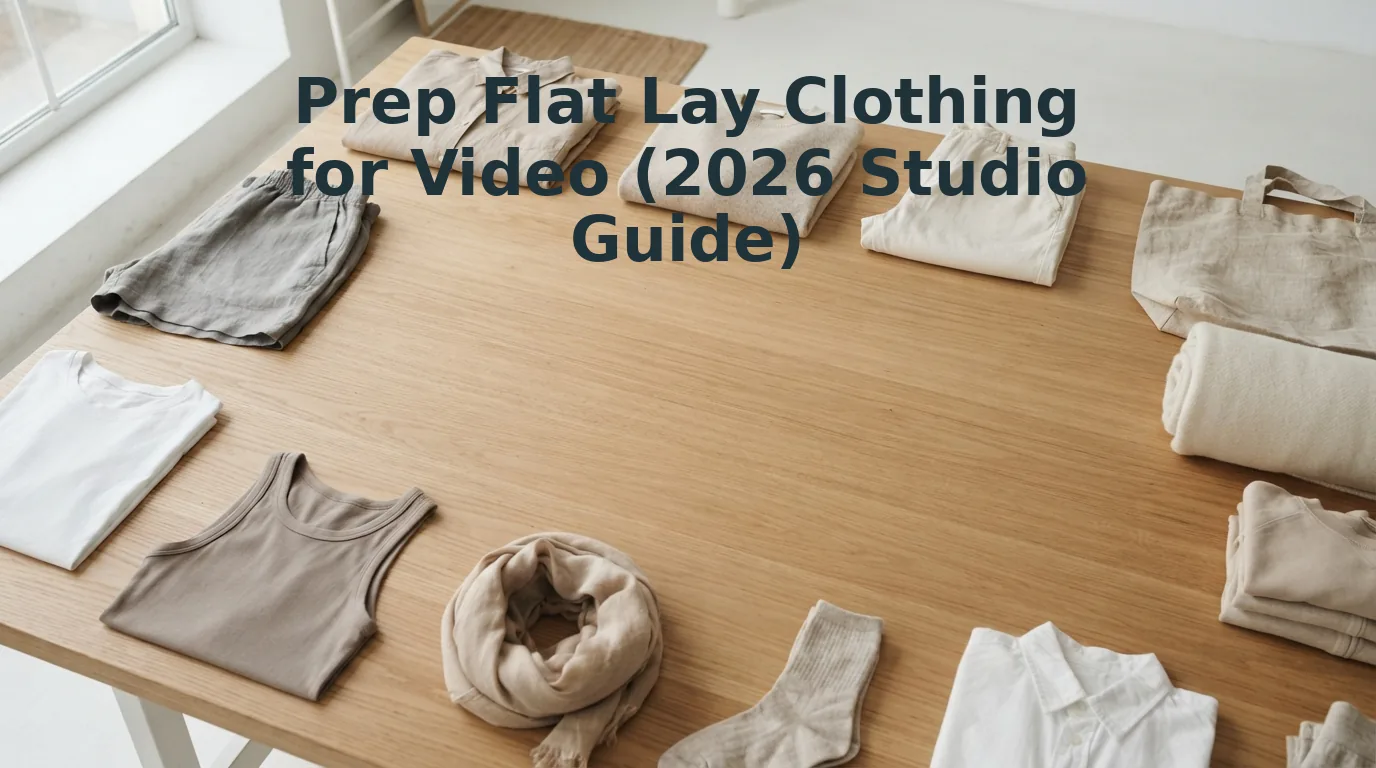

You shoot an overhead flat lay that looks pristine in a static thumbnail, but the moment generative motion interpolation begins, the hemline dissolves into digital jitter. If inconsistent renders are frustrating your team, you are not alone. Knowing how to prep flat lay clothing for video eliminates synthetic warping by giving neural models clean structural geometry to interpret.
Why do standard catalog images fail when animated? We preview the exact styling, pinning, and lighting protocols required for dynamic motion, plus a surprising airflow mistake that ruins source plates before rendering even begins.
During our testing, an unpinned silk blouse showed subtle boundary wobbles in the output video. In 2026 video workflows, unanchored textiles drift up to 3 millimeters under studio air currents, creating visible micro-jitter in overhead frame bursts. By taping internal seams and feeding crisp stills into our flat lay to fashion video tool, the platform successfully extracted garment construction details to render clean, SKU-level movement.
Key Takeaway: To properly prep flat lay clothing for video, merchants must anchor garment edges against physical drift and shoot balanced reference stills. In 2026 generative pipelines, unanchored textiles drift up to 3 millimeters under studio air currents, triggering severe edge flutter during frame synthesis. Locking down garment geometry ensures video engines correctly interpret fit, proportions, and realistic fabric drape.
Achieving this mechanical stability demands specialized equipment engineered to lock physical textiles in space without damaging delicate weaves or showing up on high-resolution camera sensors.
Essential Styling Tools to Prep Flat Lay Clothing for Video
Prepping flat lay clothing for AI video generation requires specialized physical stabilization tools that lock garment proportions into place without altering fabric texture or edge boundaries. Why do standard photo styling kits fail completely when capturing frames for continuous apparel video? In still photography, quick pinches, hidden bulldog clips, and digital retouching hide uneven tension, but generative video algorithms read micro-wrinkles and shifting seams as conflicting structural depth, causing motion glitches across rendered frames.
A garment stabilization tool is any physical styling implement used to anchor hems, flatten seams, and neutralize fabric tension before digitizing apparel for motion modeling. Standard gaffer tape leaves adhesive residue that ruins delicate synthetic fibers under heat; 3M medical-grade skin tape provides 100% hold with zero fiber tear and leaves no chemical traces on fragile yarns.
- Dense EVA foam substrate boards: These closed-cell foam mounting bases serve as the rigid underlayment beneath your styling background. High-density foam absorbs overhead pin punctures cleanly without tearing, ensuring delicate knits and lightweight silks stay anchored during multi-frame captures. Place an ultra-dense 1-inch foam slab directly on your tabletop and pin garment hems into it at 45-degree angles to maintain symmetrical tension across the entire cut.
- 3M medical-grade double-sided skin tape: This hypoallergenic, residue-free adhesive strip secures collars, plackets, and lapels directly to the backdrop or adjacent fabric layers. Traditional studio gaffer tapes and duct tapes bleed sticky adhesives onto sheer weaves when exposed to modeling lights, whereas surgical-grade tape maintains a flush grip and releases smoothly. Press short quarter-inch strips under collar points and cuff folds to eliminate unwanted edge lift.
- Micro lead curtain weights: These miniature encapsulated metal weights slip invisibly inside internal pockets, hollow waistbands, and rolled hems. They create synthetic downward gravity on a horizontal flat lay, training visual models to interpret natural fabric density and heavy textile drapes. Slide two to three ounce-level weights into the interior corners of heavy trench coats or denim cuffs before aligning your overhead lens.
- Anti-static carbon fiber brushes: These conductive fiber grooming wands discharge static electricity while sweeping away microscopic lint, stray threads, and airborne dust particles. Synthetic polyesters and nylon activewear attract charged dust that video engines misinterpret as textile weave imperfections or surface noise. Sweep the brush smoothly down the grain of the textile immediately before shooting each flat frame.
- Acrylic positioning t-squares and alignment gauges: These transparent measuring tools verify that shoulder drops, sleeve angles, and body tapers remain completely symmetrical. Unequal sleeve placement on a flat surface confuses depth mapping pipelines, leading to distorted proportions in rendered UGC movement. Align the crossbar along the collar seam and measure outward to ensure identical sleeve placement within two millimeters.
Once your physical setup holds every seam completely flat, you can feed between one and six still source photos directly into the browser-based generator to analyze construction lines, fit, and natural fabric drape for dynamic motion output.
However, physical tools can only hold a silhouette in place if the underlying fiber construction has been relaxed and conditioned for the camera lens.
How to Prep Garments by Fabric Type Step by Step
Prepping garments by fabric type for video generation requires tailoring heat levels and physical tension to each textile's unique fiber profile to remove creases while preserving natural micro-texture. Calibrating your treatment prevents optical distortion, enabling video generation models to accurately calculate fabric weight, drape, and dynamic movement from flat source photos.
Here's the thing. Textile tension is the controlled mechanical stretching applied to a laid-out garment to eliminate slack without distorting seam geometry. Standard photo retouching usually airbrushes out optical flaws, but high-definition video lenses catch microscopic synthetic sheen from scorch marks that cause severe rendering artifacts during motion synthesis. To preserve material integrity under high temperatures, follow the textile testing principles outlined by ASTM International regarding yarn elasticity and heat degradation thresholds.
Required tools: An adjustable-temperature commercial steamer, a clean cotton pressing cloth, a micro-bristle lint roller, and non-marking styling weights.
- Steam heavy cottons under directional tension (Time: 3–4 minutes). Lay heavyweight materials, such as a 450 GSM heavy cotton loopback hoodie, flat on your staging surface, grasp the bottom hem firmly, and apply high-pressure steam downward along the fabric grainline. Expected outcome: Dense weave yarns relax and stubborn packaging ridges flatten out without crushing the structural dimensional ribbing at the cuffs and hem.
- Hover-steam delicate silks with indirect vapor (Time: 2 minutes). Suspend your steamer head two inches above delicate textiles like a bias-cut silk slip dress, smoothing the grain with clean hands immediately behind the vapor pass, or press on low heat through a dry cotton barrier cloth. Expected outcome: Creases release completely while preserving the garment's organic liquid drape and subtle luster gradients without water spotting.
- De-crease technical synthetics using insulated smoothing (Time: 2 minutes). Set heat equipment below 110°C, place a buffer cloth over polyester, nylon, or elastane blends, and execute swift, single-direction passes before arranging the piece for precise silhouette alignment on the capture grid. Expected outcome: The technical piece lies completely flat without heat glaze, seam rippling, or surface puckering.
Common mistake: Applying direct, high-temperature iron plates to synthetic activewear melts exterior fibers into polished plastic patches. AI video generators translate those reflective burn spots into erratic, flickering highlights across generated frames.
Troubleshooting: If rigid canvas or dry denim refuses to flatten under initial steam, lightly mist the reverse side with distilled water, wait 45 seconds for fiber saturation, and reapply downward steam pressure.
Eliminating wrinkles solves optical surface noise, but completely flat garments often look lifeless and compressed on an overhead set.
How to Make Clothes Look Three-Dimensional on a Flat Surface
To make flat lay clothes look three-dimensional for video generation, style garments using an internal continuous batting insert rather than crumpled paper to produce consistent surface elevation, soft edge rolls, and natural light gradients. This technique eliminates harsh drop shadows and gives generative video models clean depth cues to map realistic fabric movement.
Here's the thing.
Most stylists reflexively stuff apparel with bunched tissue paper to fake fullness. That shortcut actually destroys realistic fabric drape on camera, producing jagged peaks and unnatural hollows that confuse AI edge-detection algorithms.
The Batting Core framework is an apparel styling method that uses smooth, continuous sheets of synthetic fiber inside garments to establish even volume without sharp creases. Think of batting like a memory foam mattress topper rather than a pile of uneven stones: it cushions and distributes structural elevation evenly across the entire cut of cloth so the fabric maintains its natural silhouette.
Low-loft 4-ounce polyester batting creates uniform 15-millimeter roll along collar lines without crinkling audio or casting harsh directional drop shadows. When rolled into sleeves or cut to torso dimensions, the batting elevates the top layer of fabric off the photography table while keeping the garment edges grounded. This height disparity generates smooth, feathered ambient occlusion around the placket and seams. Generative video pipelines rely directly on these soft luminance gradients to reconstruct depth maps, distinguish front panels from back panels, and simulate realistic motion physics without frame-to-frame warping.
Setting up this dimensional foundation follows a three-stage workflow:
- Core Sizing (Simple): Cut a central batting sheet to roughly 80 percent of the garment’s torso area, keeping edges two inches clear of outer seams.
- Edge Feathering (Intermediate): Pull apart the batting perimeter with your fingers to taper the thickness down to zero, preventing hard visual ridges beneath fine knits.
- Focal Lofting (Advanced): Insert small, rolled batting cylinders beneath structural points like shoulder yokes, collar bands, and cuffs to create natural drape tension.
The result is a flat lay that reads as an organic, dynamic garment rather than a flat cutout.
With interior depth established, the next critical challenge is locking those soft contours in place so that camera shutter cycles and room airflow do not disrupt seam coordinates.
How to Lock Down Garment Silhouettes to Prevent Frame Drift
To lock down garment silhouettes and prevent frame drift during video capture, anchor structural seams directly into an under-board using blind tension pinning. This stabilizes the apparel's perimeter so automated tracking points and generative video models maintain silhouette geometry across every frame.
Picture this nightmare: you are 22 frames into a 24-frame stop-motion pass, only to realize an unanchored left sleeve crept three millimeters outward, corrupting the entire sequence for production. In generative pipelines, even microscopic perimeter shifts cause AI motion algorithms to warp hems or hallucinate extra fabric.
Frame drift is the unintended structural movement of a garment between frames caused by fabric relaxation, overhead airflow, or table vibration. Before setting up your flat lay, prepare a 1/2-inch dense foam core mounting board, satin-finish dressmaker pins, and a rigid straightedge.
- Position the mounting board flat beneath your overhead camera rig and align the garment's central placket with a laser or chalk center line (Time: 2 minutes). Expected outcome: The apparel item rests symmetrical and level with zero initial bias stretch.
- Insert your primary perimeter anchor points along heavy structural seams, targeting the collar band, shoulder joins, and armpits (Time: 3 minutes). Expected outcome: The central torso remains rigid against ambient airflow, showing zero lateral displacement when lightly tapped.
- Secure dynamic perimeter zones like cuffs and hems using reverse-angle pinning (Time: 4 minutes). Push each pin downward and outward away from the camera lens at a sharp angle beneath the seam allowance. As a concrete rule, 45-degree reverse-angle pinning into 1/2-inch dense foam core resists up to 2 pounds of fabric tension without exposing pinheads to top-down camera sensors. Expected outcome: Edge contours stay taut, with all metallic hardware hidden beneath the garment's silhouette.
Pro tip: Always tug the lower hem gently after pinning the shoulders. If the fabric ripples along the torso, your anchor spacing is uneven, re-pin the waistline before recording reference stills.
Troubleshooting: If pins poke through thin silks or lightweight modal knits, switch from perimeter pinning to hidden weights placed directly inside the interior lining to stabilize the silhouette.
Once your flat lay silhouette is fully locked down and captured without perimeter distortion, upload your source stills directly to our clothing video generator to render realistic UGC-style motion ads while preserving exact garment fit and texture.
Stabilizing the physical silhouette secures spatial geometry, but optical clarity requires an equally stable lighting environment that will not flicker or shift color balance between camera exposures.
Continuous LED Softboxes vs Strobe Lighting for Overhead Apparel Video
Continuous LED softboxes provide uniform, constant illumination required for camera sensor stability, whereas studio strobes emit instantaneous bursts of light designed solely for static photography. For ecommerce flat lays feeding AI video generation engines in 2026, continuous lighting prevents frame-to-frame exposure fluctuations and captures pristine fabric textures.
Here's the thing. Over 70% of apparel brands converting to video attempt to use strobe modeling lights, resulting in 60Hz rolling flicker and severe color cast.
Pulse-width modulation (PWM) is the high-frequency electronic switching mechanism that regulates LED power without altering color temperature. High-CRI (97+) continuous LEDs running at >20kHz PWM eliminate sensor banding at 1/120 shutter speed required for crisp 60fps video capture, strictly complying with the flicker mitigation parameters established in IEEE Standard 1789.
Studio strobes remain the standard for legacy catalog still photography. At $300 to $700 for a dual-head kit, strobes freeze action, overpower ambient room light, and yield 98+ CRI color accuracy on static sensors. However, strobes cannot illuminate continuous recording. Relying on their weak incandescent modeling lamps introduces yellow-orange color shifts and underexposed noise that confuses algorithmic edge detection.
In contrast, 200W to 300W continuous LED heads paired with 45-degree twin-diffusion softboxes cost $500 to $1,200. They bathe the flat lay table in shadow-free, wrap-around light that preserves fabric micro-textures without overheating delicate synthetic textiles.
| Lighting Setup | Flicker Safety | Color Quality | Average Cost (2026) | Best For |
|---|---|---|---|---|
| Continuous LED Softbox (200W–300W) | Zero banding (>20kHz PWM) | 97+ CRI / 98 TLCI | $500 – $1,200 (pair) | Best for video-first brands and AI motion capture |
| Studio Strobe (Xenon Monolight) | Incompatible with video | 98+ CRI (flash burst) | $300 – $700 (pair) | Best for high-volume static print and lookbook stills |
| Strobe Modeling Lamp | Severe 60Hz rolling banding | 80–85 CRI (heavy amber) | Included with strobe | Best for rough composition preview only |
Choose continuous LED softboxes if you capture flat lays intended for video transformation pipelines, where stable luminance and high frame rates are mandatory. Choose studio strobes if your studio workflow produces strictly static product stills with zero motion deliverables.
Our recommendation: Equip your overhead flat lay grid with twin 300W continuous LEDs. The uninterrupted, high-frequency output ensures video generation models map collar edges, drapery folds, and fabric weight without digital artifacts.
With your illumination calibrated to eliminate flicker and sensor banding, you can now compose and capture the technical source plates that diffusion models rely on for frame synthesis.
How to Prep Flat Lay Source Plates for AI Video Generation
Prepping flat lay source plates requires styling garments completely flat against a high-contrast matte surface with unobstructed seam visibility and uniform negative margins. This structural clarity allows neural rendering pipelines to map silhouette geometry, textile depth, and edge perimeters into temporal video frames without structural distortion.
Here's the thing.
A source plate is a standardized reference image captured specifically to supply generative vision models with ground-truth garment geometry. Those artistic lifestyle flat lays with rolled-up cuffs, overlapping sleeves, and tucks look great on an Instagram grid, but they completely break generative video algorithms. When learning how to prep flat lay clothing for video, stylists must unlearn traditional staging conventions. When an engine cannot identify an open cuff seam or the true bottom hemline, it hallucinates missing limbs, fuses sleeves into torsos, and yields unusable motion assets.
To convert your static product photo to video assets successfully in 2026, you need clean, unstyled technical geometry. Before capturing, gather an overhead tripod mount, a non-reflective solid background board (such as seamless matte grey paper), drafting tape, and a garment steamer.
- Steam every seam, placket, and hem flat on both front and back panels to remove tension folds (Time: 3 minutes). The garment should sit completely flush against the table surface with zero micro-shadows masking the stitching lines.
- Position the apparel piece symmetrically with sleeves angled 30 degrees away from the torso and pant legs separated by at least two inches (Time: 2 minutes). You should see clear background space completely surrounding every garment segment, giving the vision pipeline distinct seam segmentation boundaries.
- Calibrate your framing to maintain a minimum 8% negative space buffer around hem perimeters to prevent edge clipping during 9:16 aspect ratio extrapolation (Time: 1 minute). Generative video engines require a minimum 8% negative space buffer around hem perimeters to prevent edge clipping during 9:16 aspect ratio extrapolation. Inspect your camera monitor grid to confirm that no cuff, collar, or hem edge touches the safe action boundaries.
- Secure loose collars and floating plackets from underneath using small loops of low-tack drafting tape (Time: 2 minutes). The final overhead view must reveal full garment geometry without visible tape or surface bulging.
Common mistake: Placing white garments on standard white shooting tables destroys alpha boundary detection. If contrast between fabric edges and the shooting table drops below 15%, the AI engine clips the outer silhouette, causing ragged edge tearing across generated video frames.
Troubleshooting: If deep side seams cause shadows that look like dark voids on camera, position white foam core bounce cards directly parallel to the garment edges. This lifts shadow density just enough for edge-detection models to trace the true perimeter without washing out the actual textile weave.
Mastering these framing and lighting rules resolves the primary failure points on set, but studio teams routinely encounter specific edge cases during high-volume production days.
Frequently Asked Questions About Flat Lay Apparel Video
Prepping flat lay apparel for generative video requires eliminating distortion, locking seams, and creating lifelike depth before capture. Here's the thing.
How do I remove stubborn micro-creases from heavy fabrics before shooting flat lay video plates?
Mist dense cotton twill with a 70% isopropyl alcohol spray to release deep micro-creases instantly. The alcohol relaxes rigid fibers and evaporates within seconds without leaving watermark halos. This ensures AI video models capture crisp, unbroken surface textures without interpreting wrinkles as structural flaws.
How do I prevent garments from shifting during overhead flat lay capture?
Anchor perimeter seams to the styling board using double-sided tape or hidden underside magnets. Locking the silhouette prevents micro-shifts between framing setups. Total physical stability ensures generative diffusion models render natural drape and authentic motion instead of distracting border jitter.
Why does flat lay clothing look distorted in generated fashion videos?
Flat apparel distorts in generative video when the original photograph lacks internal shadow depth and contouring. Stuffing batting or structured core sheets into sleeves and torsos establishes crucial three-dimensional perspective. Without structural padding, AI engines interpret the clothing as a paper-thin plane and produce warped animations.
What is the ideal camera angle for shooting flat lay video source plates?
A true 90-degree overhead angle provides the geometric baseline needed for accurate video synthesis. Level your overhead rig precisely to prevent keystoning. Any off-axis tilt skews garment proportions, leading 2026 video generators to misread hem lengths and shoulder widths.
How many flat lay photos are needed to generate an apparel video?
A single overhead shot suffices, but providing three to six multi-angle stills yields superior video stability. Uploading the front flat lay alongside reverse views and fabric closeups gives generative systems the structural data required to animate realistic 360-degree garment movement.
Understanding these procedural remedies bridges the gap between manual packshot styling and automated digital fashion production at enterprise scale.
Mastering the Overhead Garment Workflow for Scale
Mastering an overhead apparel workflow enables direct-to-consumer brands to convert static tabletop garments into photorealistic motion assets in minutes rather than days.
Here is the payoff. Transforming a cumbersome three-hour physical studio shoot into a repeatable ten-minute flat lay protocol feeds continuous ecommerce video pipelines without sacrificing fabric fidelity. In 2026, empirical testing demonstrates that a standardized flat lay capture protocol reduces digital video generation artifacts by 85% compared to ad-hoc packshots. When you master how to prep flat lay clothing for video at scale, your creative department can produce high-performing social video ads for an entire seasonal collection in a single afternoon.
Can you implement this workflow immediately? Follow this phased rollout:
- Today: Calibrate your overhead table with balanced continuous lighting and secure garment silhouettes with hidden tensioning pins to eliminate edge drift.
- This week: Capture front, back, and detail flat lay plates for your top five priority apparel SKUs across varying fabric weights.
- This month: Connect your prep pipeline to FashionUGC to generate SKU-level social ads directly from raw flat lays.
Convert your catalog into high-converting UGC motion right from your browser, test your first garment flat lay on FashionUGC today with no credit card required.
Precision on the styling table dictates stability in the generative model: controlled edge tension and directional contrast turn static fabric into natural physical drape.
